Cakes & Desserts & Liqueurs
Various projects at Royal HaskoningDHV
Projects

Polar Vertex

Drawing of the week book
How to turn hundreds of whiteboard drawings in a great looking book.

Modern lamp
How to build your own great looking lamp with wood and easy to get materials.

VouwGrond - Paper craft soil layer visualization
Soil types at almost any location in the Netherlands using paper craft!

MySensors based sensors + dashboards

Simple DIY wireless button
How to make a BIG wireless button to trigger anything on your computer, laptop or Rasberry Pi.

DIY dressoir using wood

Candle powered Christmas pyramid
Building a Christmas pyramid (Weihnachtspyramide) with wood.

Construction of a Gloggomobil

Homebuild windmills

DIY Tetrapod plush

Climagon climate paper craft

Internet hardware furniture
Old code
Various games / projects at Deltares

Pompeii - Bike pump controlled game

Om de put (Around the pit)

Levee Patroller

Groen Eiland

Zand verdeler

Horsegame

CPT - game

Port of the Future (Corealis)
Serious game about ports of the future; nature based solutions.

Virtual Reality versions of experimental facilities

CIrcle
CIrcle a tool to support the analysis of domino effects of critical infrastructures.

Sustainable Delta Game
Game which combines 3d graphics, playing cards and a simulation model.
Older games
Augmented Reality / Graphics

Subsoil on a mobile device
My Master thesis: Visualizing and estimating the distance and depth of underground infrastructure.

Real-time visualization of water simulation
Turning calculated water flows into a real-time visualization.

RED - Motion captured animation

Open Data Sources for 3D Data Visualisation
DIY Sensor networks at home using MySensors
Wireless sensors throughout the house and outside
For many years I have tried to get some sort of wireless sensors network to work in- and outside the house. However the solutions was always rather cumbersome and not reliable. Especially the typical 433 mhz modules (cheap, and easy to find on AliExpress/EBay) were common in use. The modules did not provide any means of "debugging" either: It really was a case of just sending data and hopefully it would arrive on the receiver side. In some countries 315 mhz is used instead of 433 mhz.
Although 433 mhz modules can still be quite handy (when you would like to interface with wireless weather stations or doorbells) there are quite some better approaches to wireless data transmission now, such as the Nordic nRF24L01 modules. These can also be easily found on AliExpress of EBay for rather cheap prices. They might, however, be not the official one from Nordic Semiconductor.
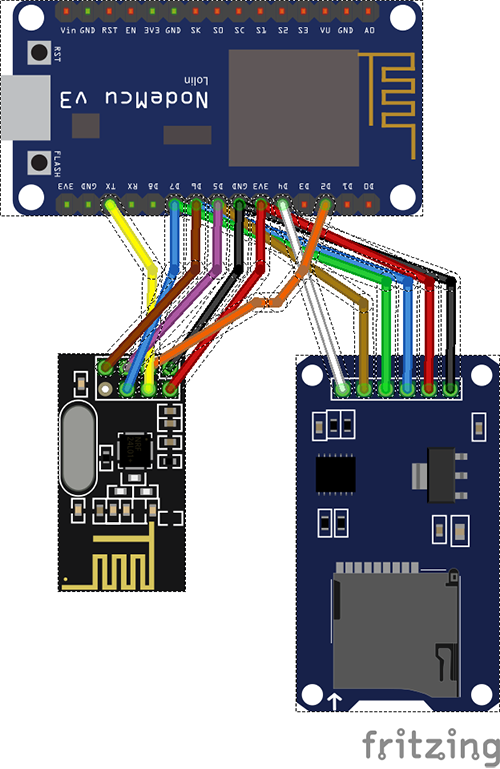
Combining these nRF24L01 modules with a simple Arduino (any variation) opens up a world of reliable communication. When I discovered the libraries of MySensors.org my enthousiasm grew even more. MySensors allows you to quickly set-up a (mesh) network of connected sensors that communicate with a gateway. A gateway is a device which is always on and available. This could be a Raspberry Pi, another Arduino device or, as in my case, an ESP8266. Why I like the ESP8266 is that it allows practically the same code (and therefore effort) as programming an Arduino, using the same Nordic module and having WiFi support to transmit data to an online script (such as PHP) and share information directly on a MQTT protocol. In my case, also SD card backup has been added if there would be any communication failures on the WiFi.
Hardware
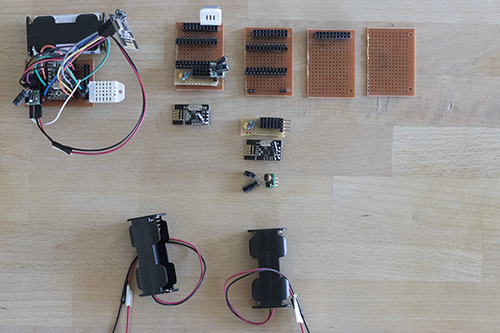
The sensor nodes consist of the following parts, which can easily be purchased on AliExpress:
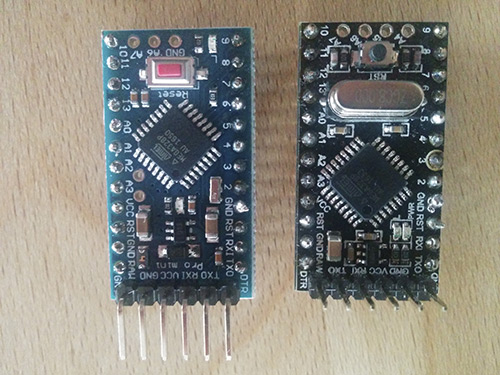
- Arduino Pro Mini 3.3v
- nRF24L01 modules (with or without antenna is up to you)
- Breadboards. I used these veroboards to make soldering a bit easier
- 0.8v to 3.3v step-up module
- Some resistors for voltage monitoring
- Some capacitors for power supply stability
- Container to put them in (for testing purposes I used cream cheese boxes
 )
)
- And your sensors of choice. See below what does what. (eg. BMP280 / DHT22 / BME280 / Pump for watering soil / Soil moisture sensor
The gateway is build using:
- An ESP8266 board and development board if you prefer.
- nRF24L01 module, I would recommend with antenna
- SD card module (optional). See below how to connect it to the ESP8266
- Standard USB power supply/charger with micro USB cable
The network
Currently the MySensors network at my house consists of nodes which are located at various locations in- and outside the house: Living room, bed room, fridge, outside and the basement.
The currently used sensor modules can again, be bought quite cheaply at AliExpress. Connecting the sensors mostly consists of finding the right library and connecting two to three wires. For instructions for many sensors you can take a look at the MySensors page.
- Barometric / Temperature / Humidity: BMP280E
- Temperature only: DHT11 or DHT22
- Plant soil moisture sensor: these kind, but only the "fork" is used.
- Water pump: Peristaltic pump for 3v. See more instructions below how this was connected.
- Gas and electricity consumption through the P1 port of the smart meter (Landis Gyr)
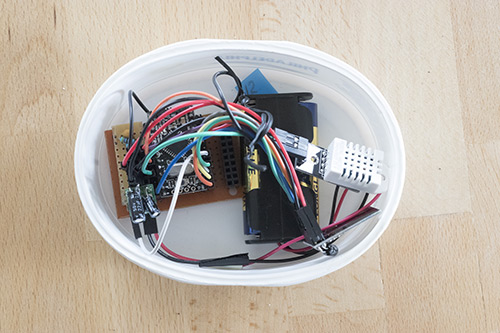
I am currently working on another plant sensor + pump combination. The air quality sensor needs quite some warm up time, and not sure about it's reliability.
Data storage
On SD card (see issue) and MQTT (live updates) and database through remote PHP script.
Website
A simple website requests the most recent data from the database (using PHP) and displays it. The website is build using BootStrap4 and ChartJS. As it is only for the occasionaly monitoring, it does not need to be much more right now.
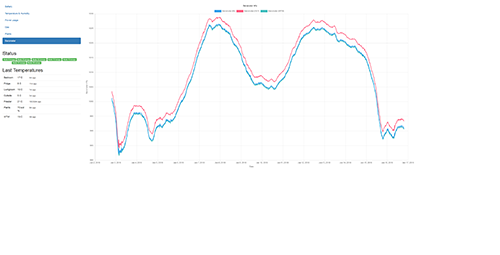 One barometer has a different opinion out of the three.
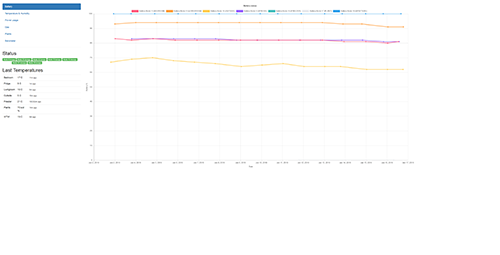 Battery levels over time. Fluctuate a bit with temperature.
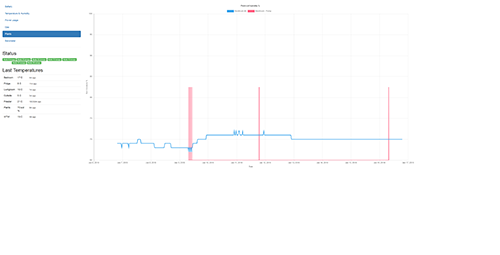 Soil moisture and indication when pump was turned on for 20 seconds (red line).
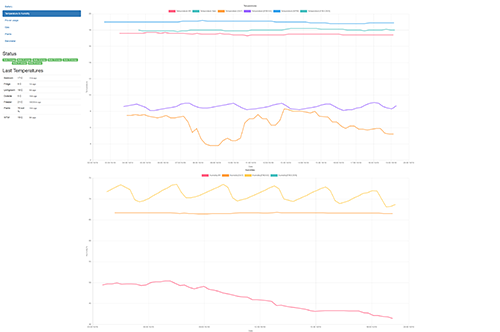 Temperature sensors.
MQTT
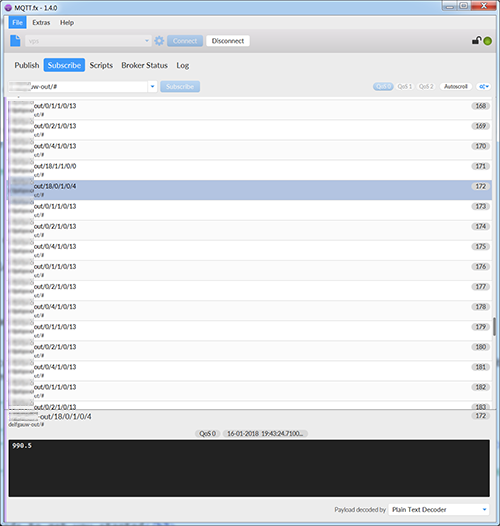
All data that is sent to the gateway is also forwarded to a remote MQTT server. One could connect to this to pick up the live feed.
SD-card
And an SD-card module is used at the gateway as extra backup. The receive() function of the MySensors gateway is overloaded to perform this action. Please note that the SD-Card module needs a modification to work properly with multiple devices. You will have to solder an extra wire between these two locations. The pin at the right of the IC needs to be lifted and then connected to the first pin at the left side of the IC. Otherwise, you cannot use two devices on one Arduino. It took a while to find a forum that mentions this issue... Unfortunately cannot find the original source for this.
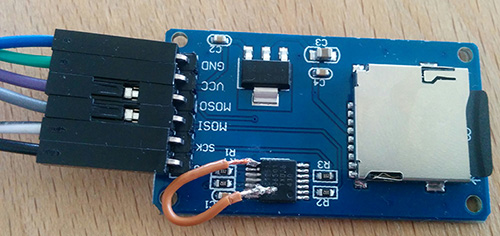
Low power modifications
In order to run the Arduino Pro Mini 3.3v for a very long time on just 2AA battery's, you will have to remove some components. This is a permanent change to your devices.
You will have to remove the power regulator and the power LED from the device. This will greatly reduce power consumption. Note that from that point on you will have to use the Arduino Pro Mini from batttery power. When connecting USB wires, do not connect the VCC anymore! The ground should still be connected however. Right now I do not have a specific photo of the modifications yet, but you can find clear instructions on Andreas Rohner's websiteHow to modify an Arduino Pro Mini (clone) for low power consumption.
Various photos of some nodes
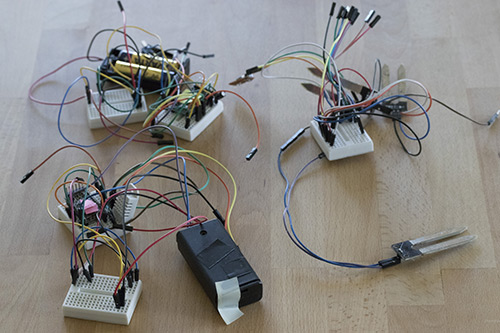 Some early prototyping on small breadboards.
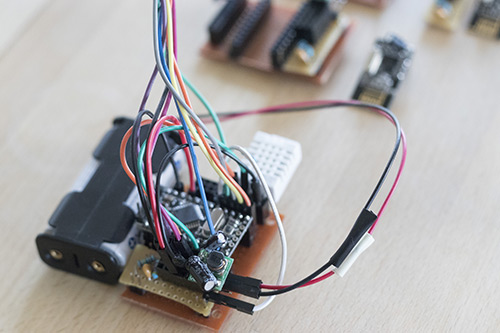 A completely functional node.
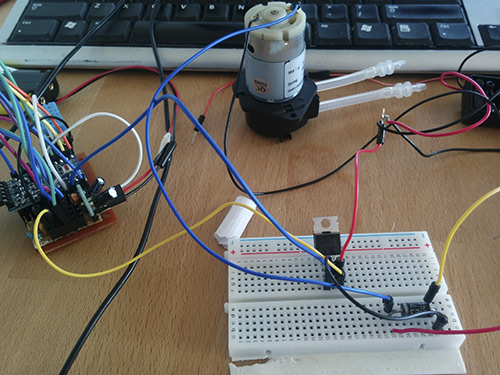 Prototyping the pumping system.
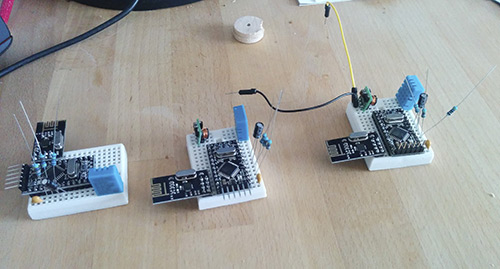 Preparing all the parts to build a couple in one go.
Some source code
Still have to clean this up a little bit, but should be online soon!
Fritzing examples
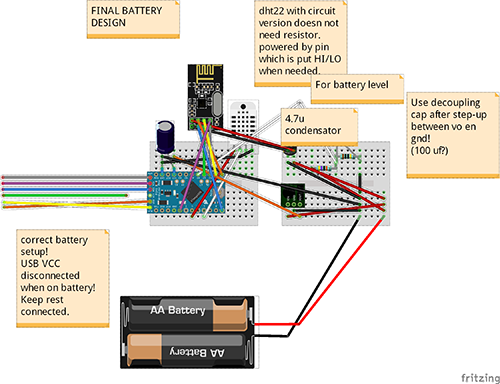
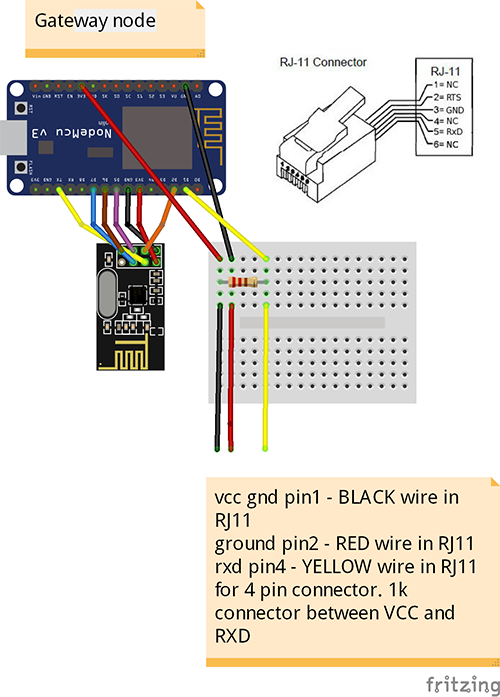
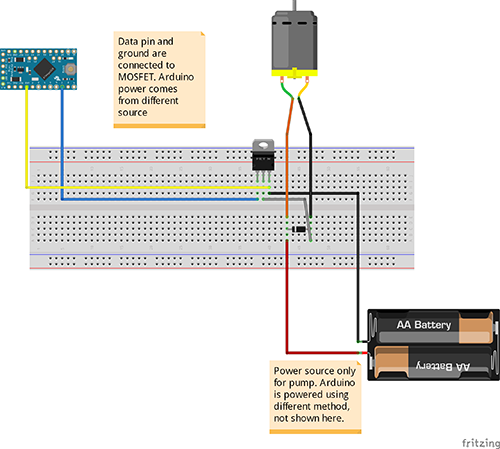
Here are a couple of my designs that I use. These are very likely correct, but please double check. It is always possible that a wire got moved by accident. The pump and MOSFET display how to power the pump using another independent battery source from the Arduino Pro Mini 3.3v.
Inspiring reads to get you started
Some articles that I thought were good a good read to learn more about MySensors, low power Arduino's, etc.
- My 2AA battery sensor - My nodes are quite based upon these forum posts
- Arduino Low Power - How To Run ATmega328P For a Year On Coin Cell Battery - Interesting read to learn about some low power topics for Arduino boards.